ADD A CAMERA TO INSTEK DIGITAL'S NVR
There are two methods to add a camera to Instek Digital's NVR. Method one is utilizing Instek Digital's web interface and method two is through Instek Digital's VMS Command Center.
Method 1 | Adding a camera utilizing Instek Digital's web interface (from NVR-version R5.3.4 and up)
- Open Microsoft Internet Explorer and type the NVR's IP-address in the address bar;
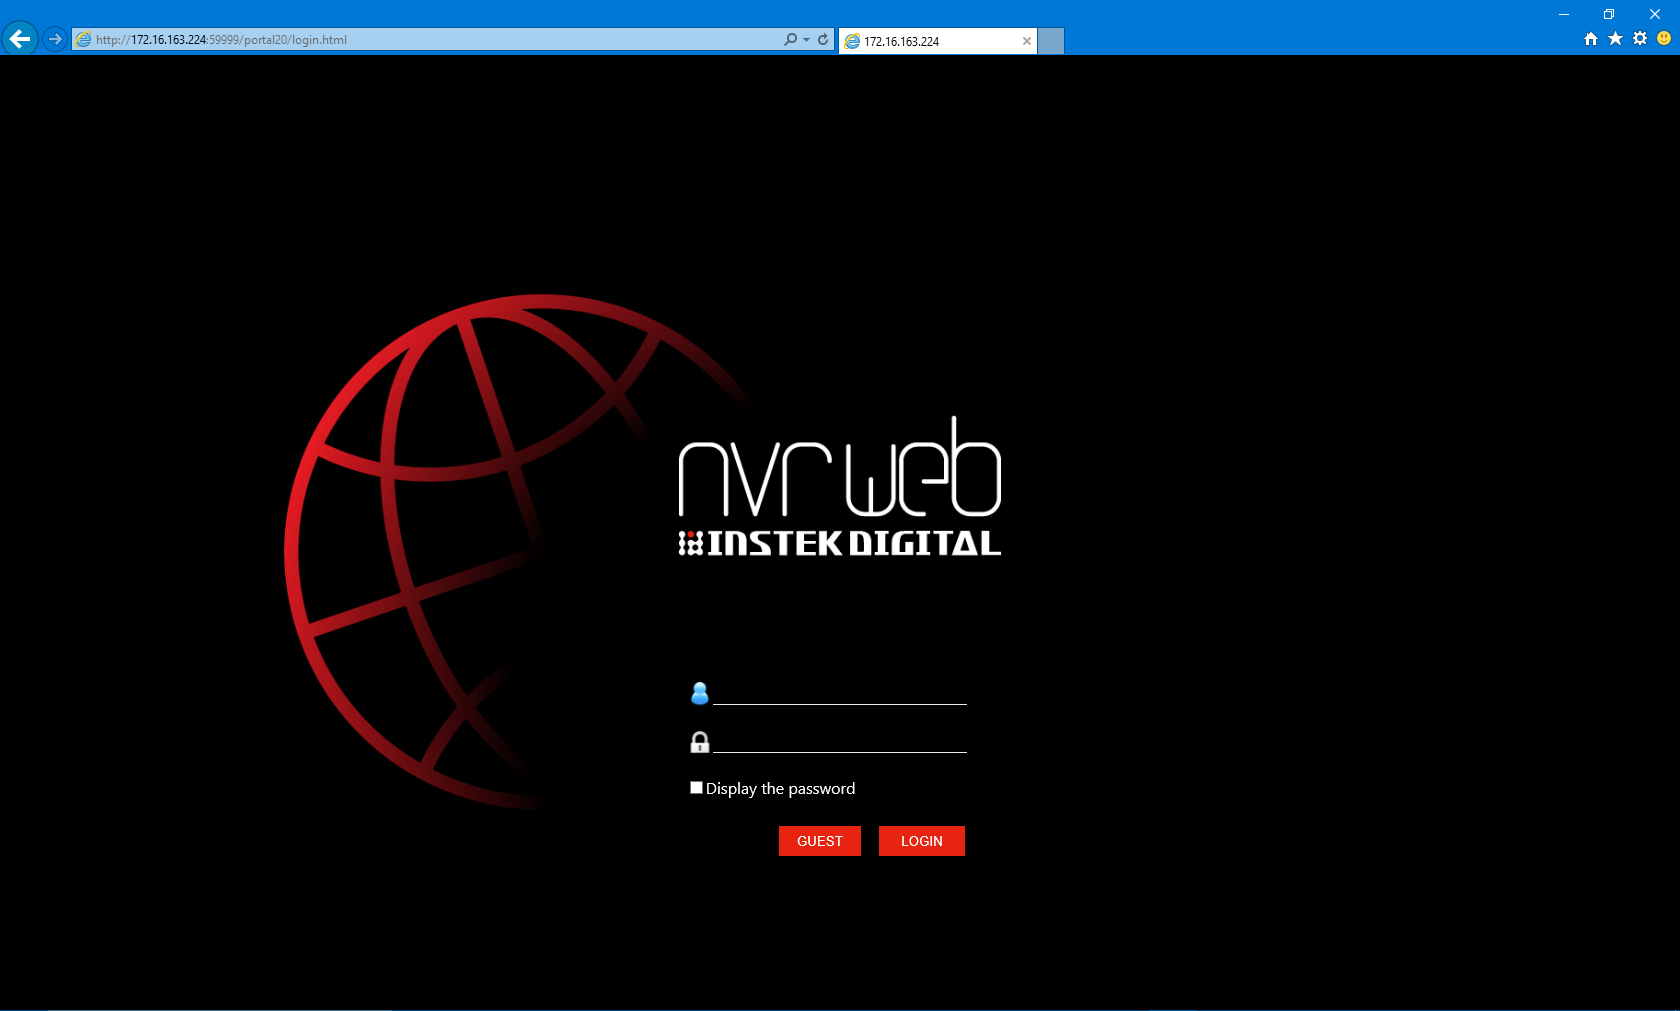
- To enter the Instek Digital's web interface, type the user name and password (default username is root and password is id;
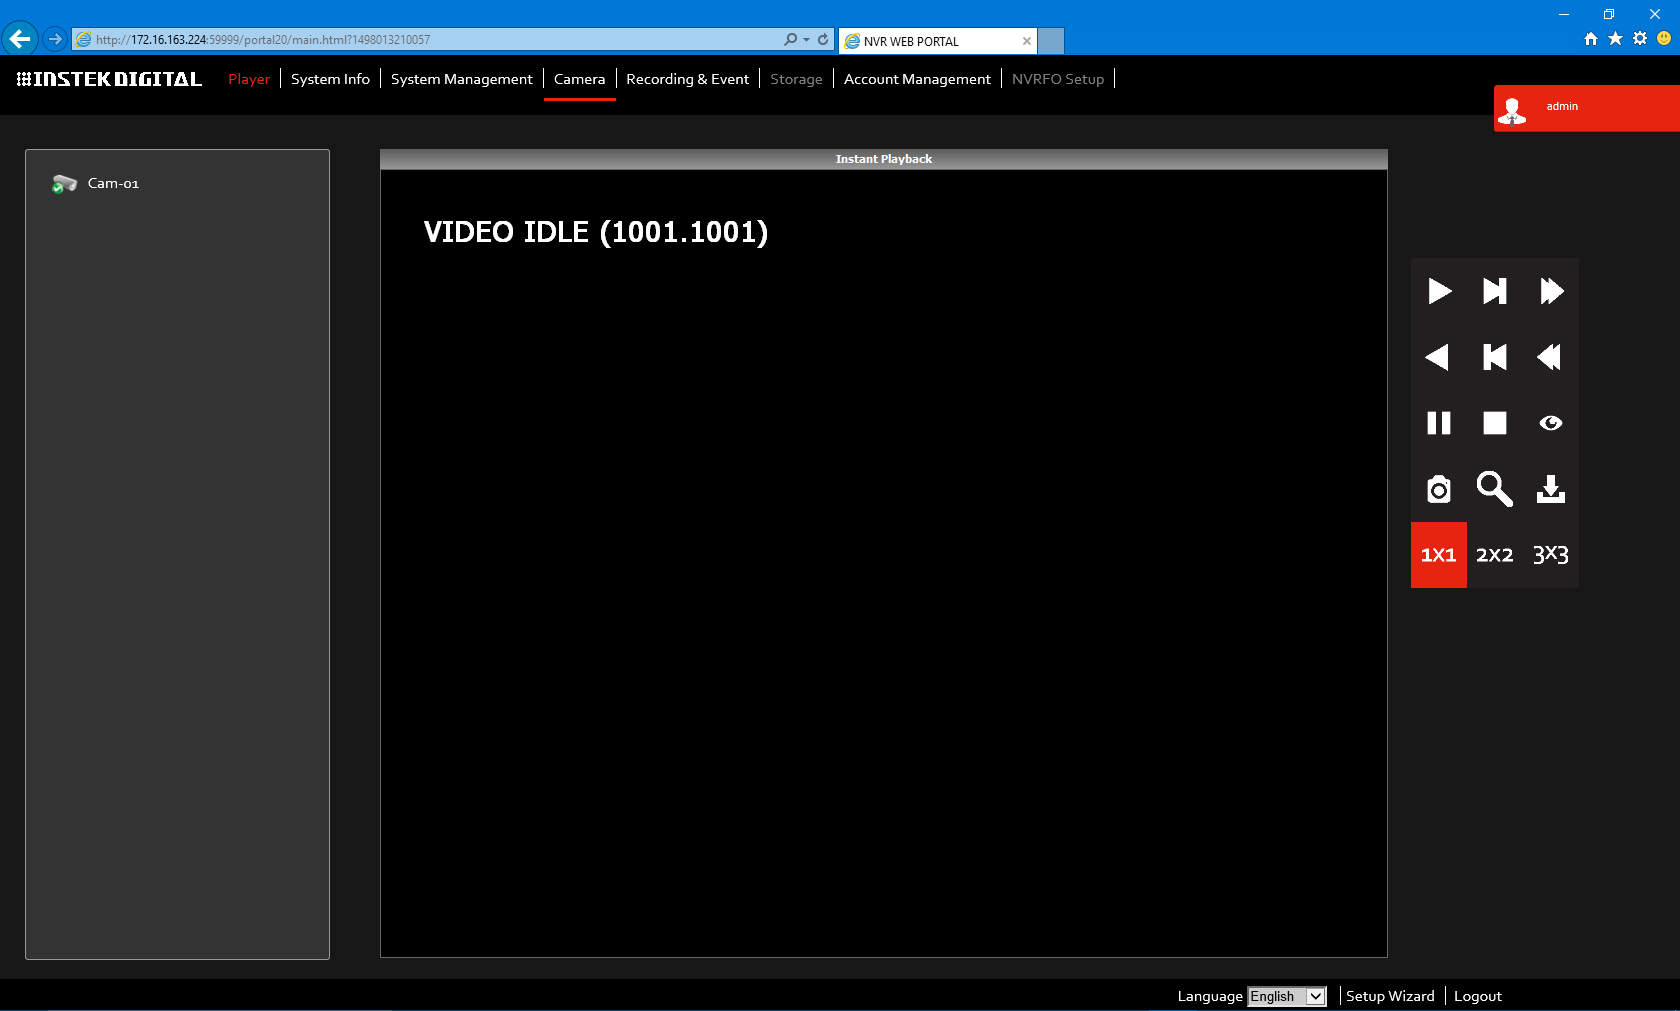
- Select the Camera tab at the top of the screen;
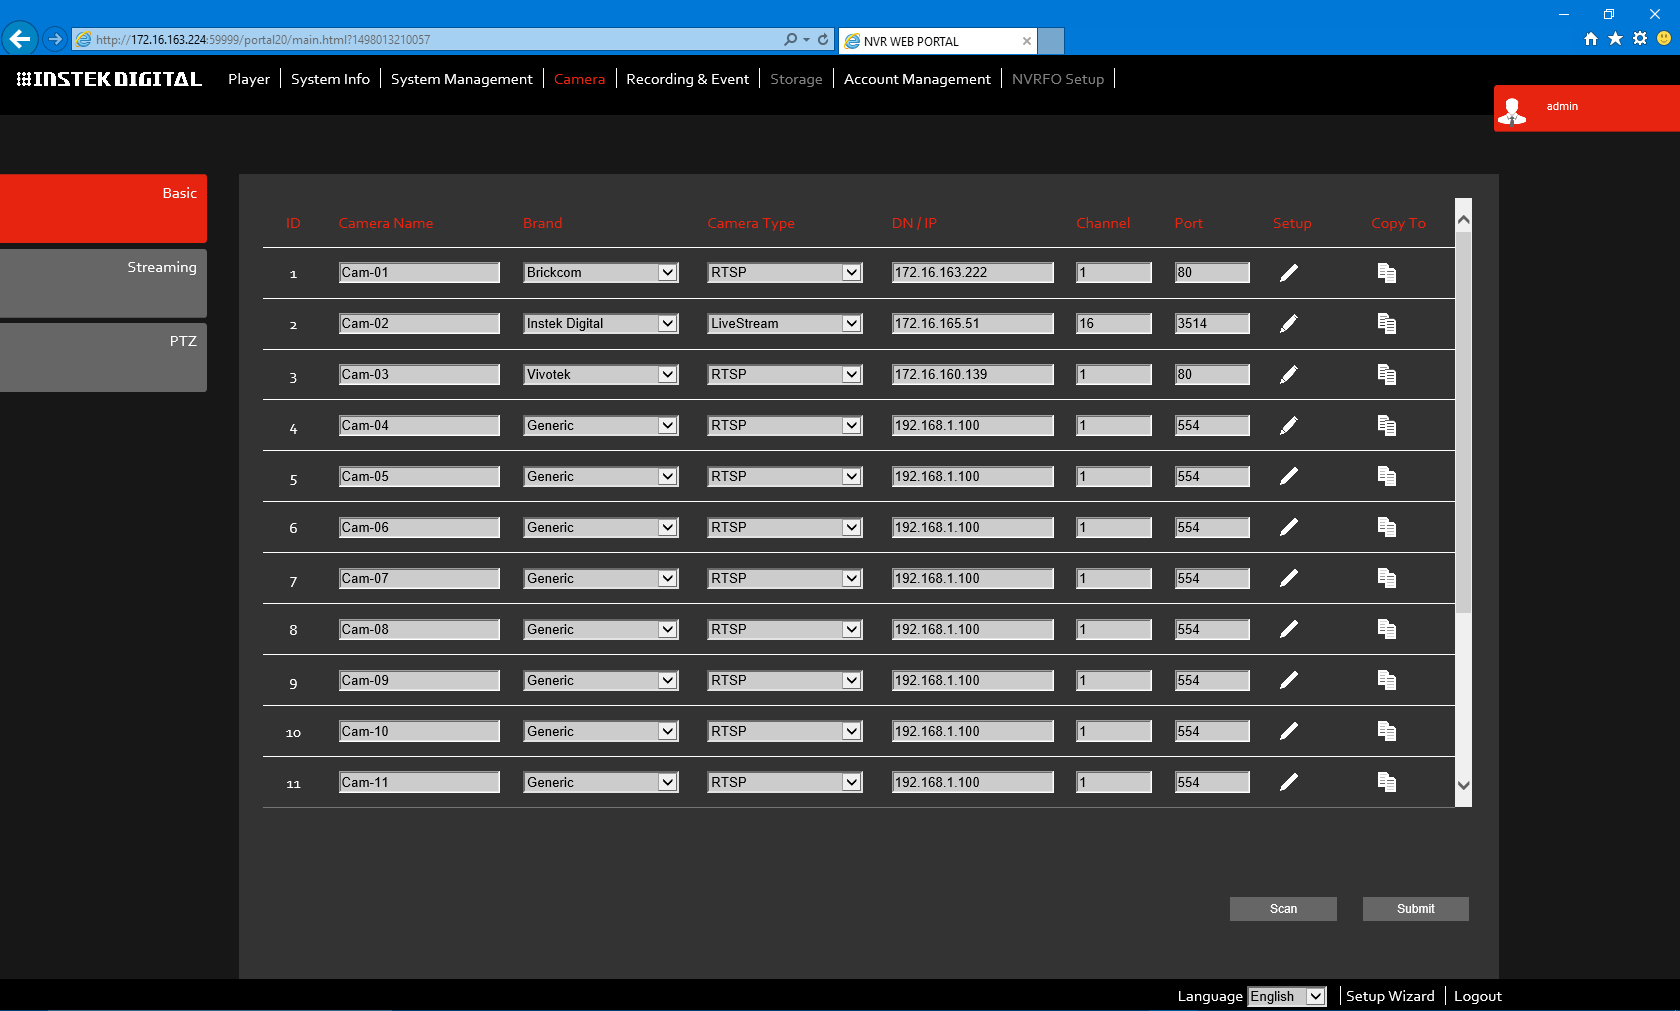
- There are two methods to add a camera; manually or automatically;
- Manually can be done by filling in the required field as below picture;
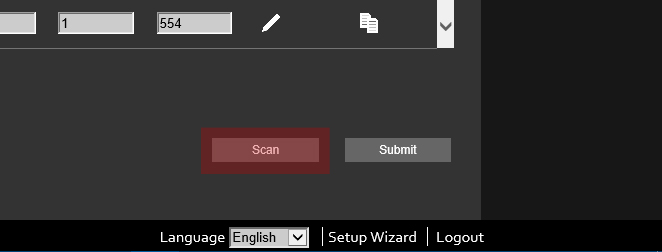
- It is also possible to scan the NVR for all available cameras;
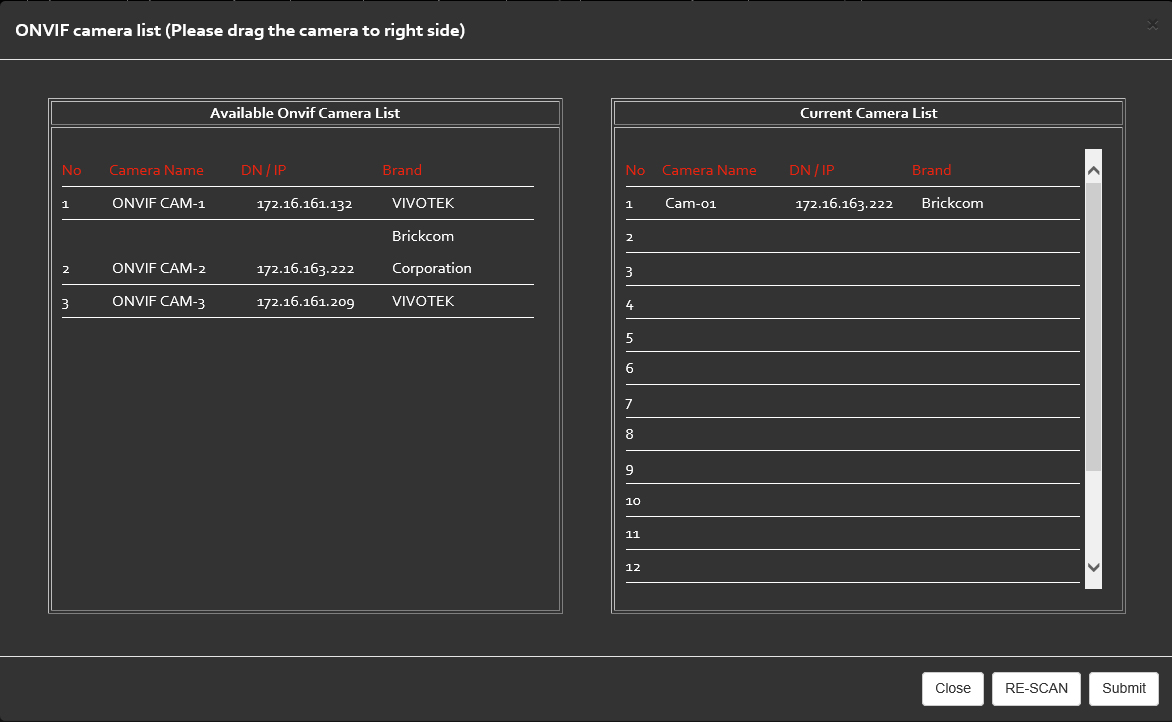
- Click on the Scan button and available camearas will be displayed;
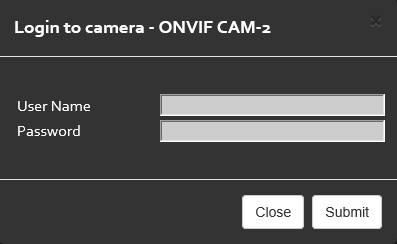
- Now drag and drop the required camera from the Available Onvif Camera List column to the Current Camera List column and enter the user name and password of the camera;
- Click the Submit button to save the added cameras;
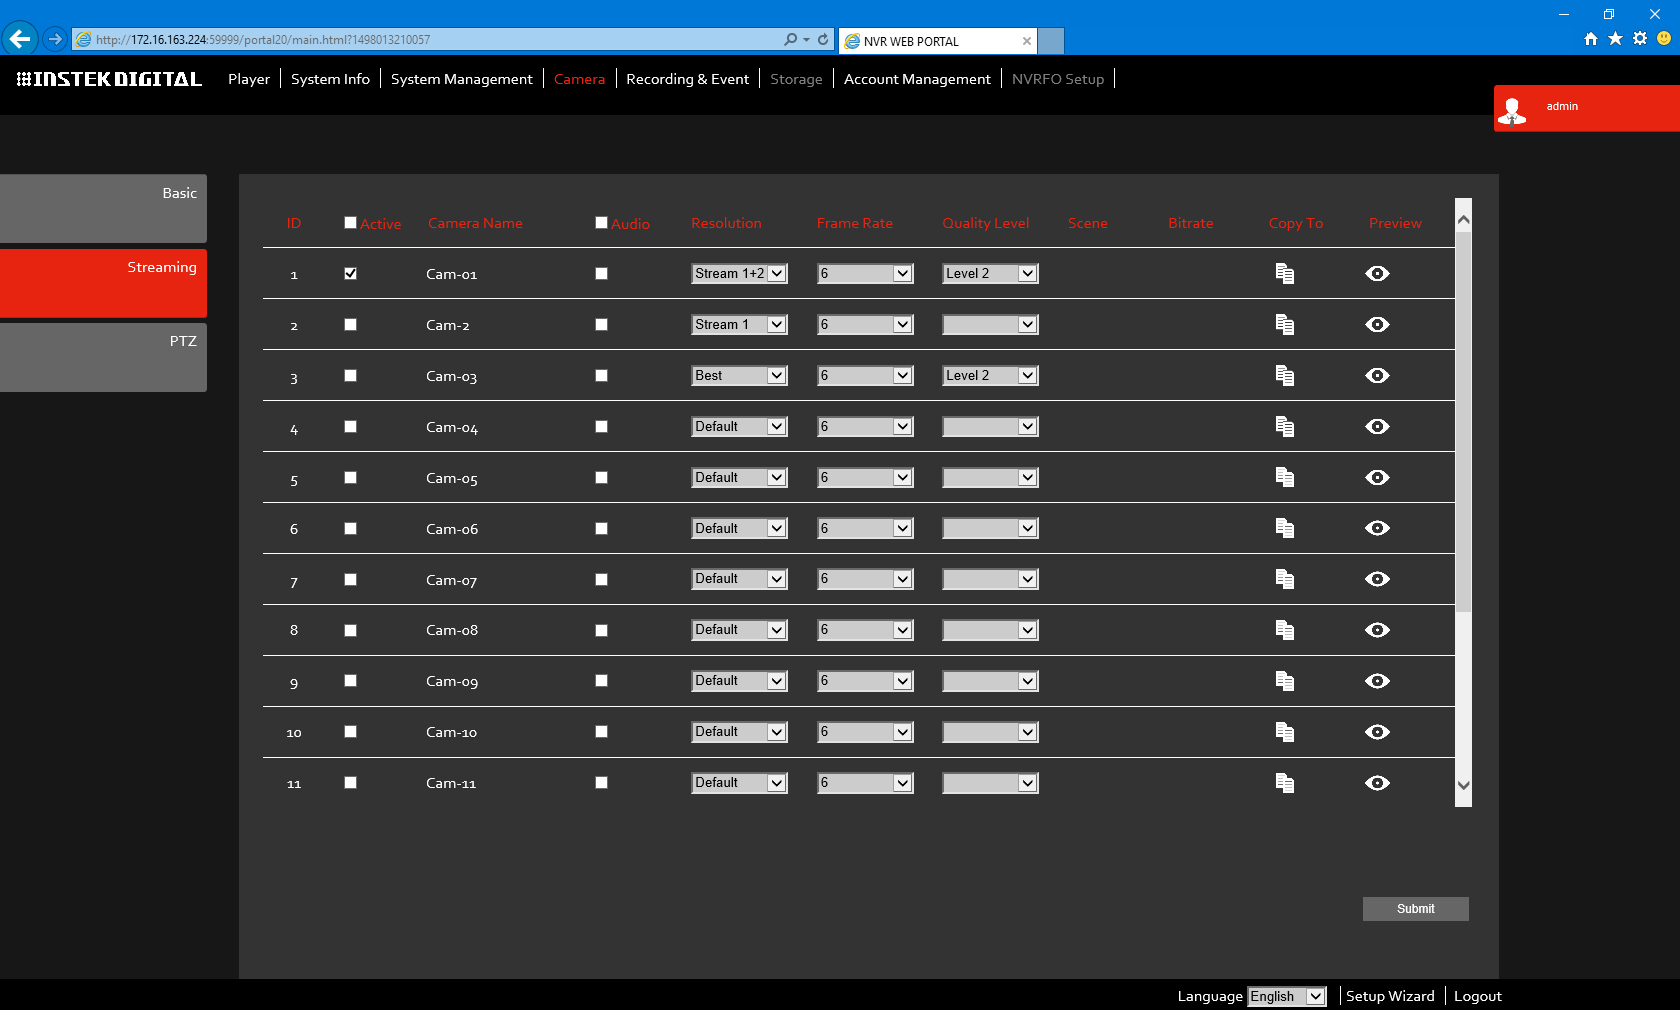
- Select the Streaming tab at the left side;
- Select the Active check box from the required camera(s) to activate the camera(s);
Method 2 | Adding a camera utilizing Instek Digital's VMS Command Center
- Open Instek Digital's VMS Command Center;
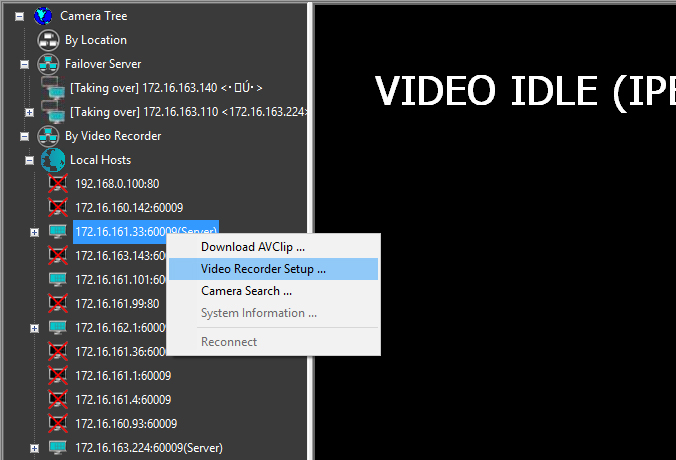
- From the device tree, right click the required NVR;
- Login to the NVR, type the user name and password (default username is root and password is id;
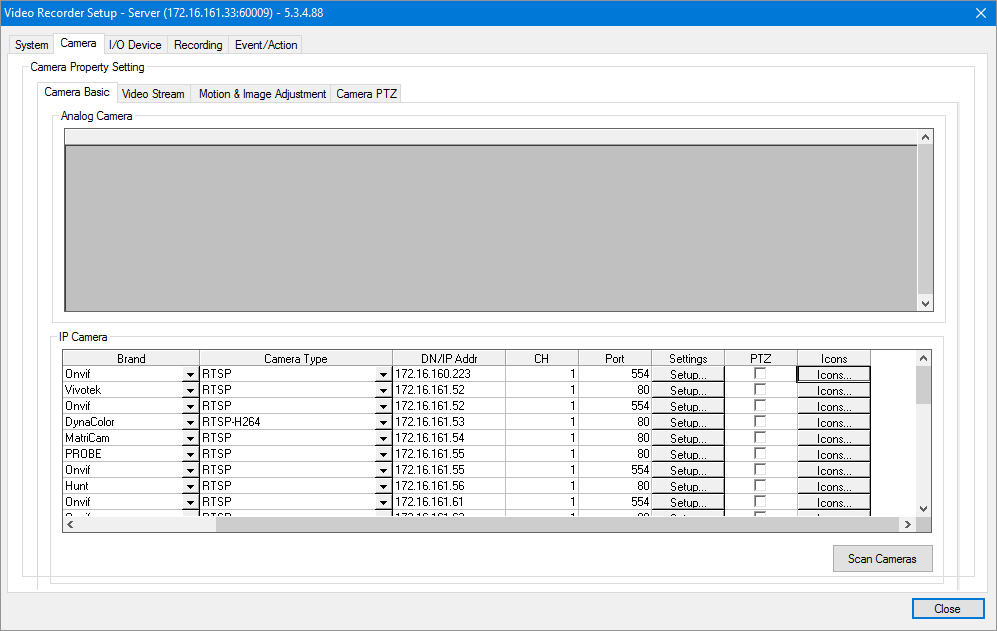
- After logged in, the following window will appear;
- Adding cameras can be done manually or automatically;
- Utilizing the automatic method, click on the Scan Cameras button;
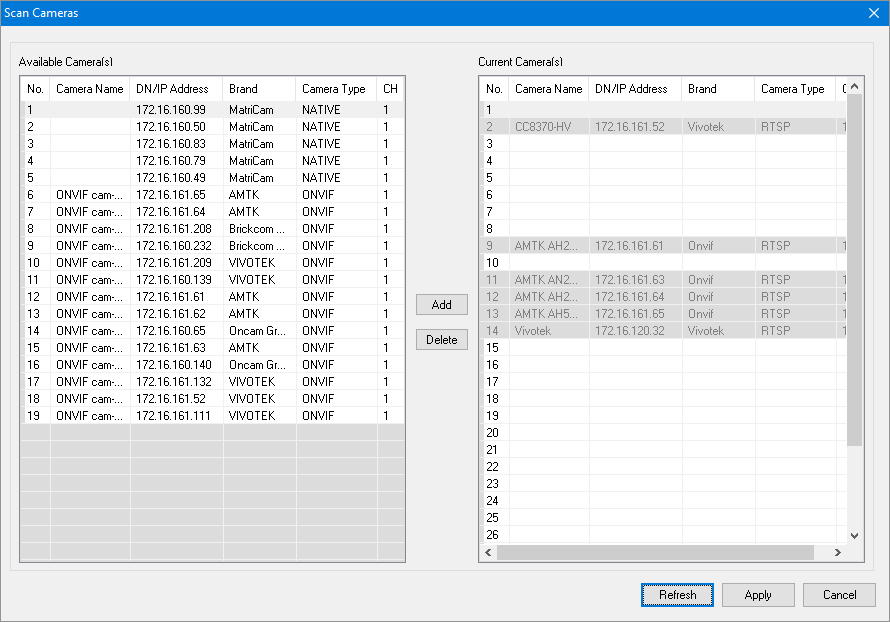
- After the scan is finished, the following window will appear;
- To add a camera, click on the Add button;
- After all cameras have been added, click the Apply button;
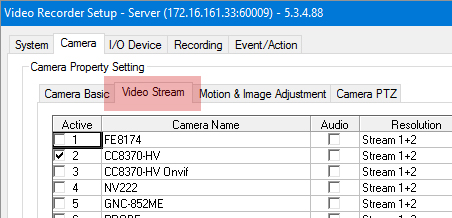
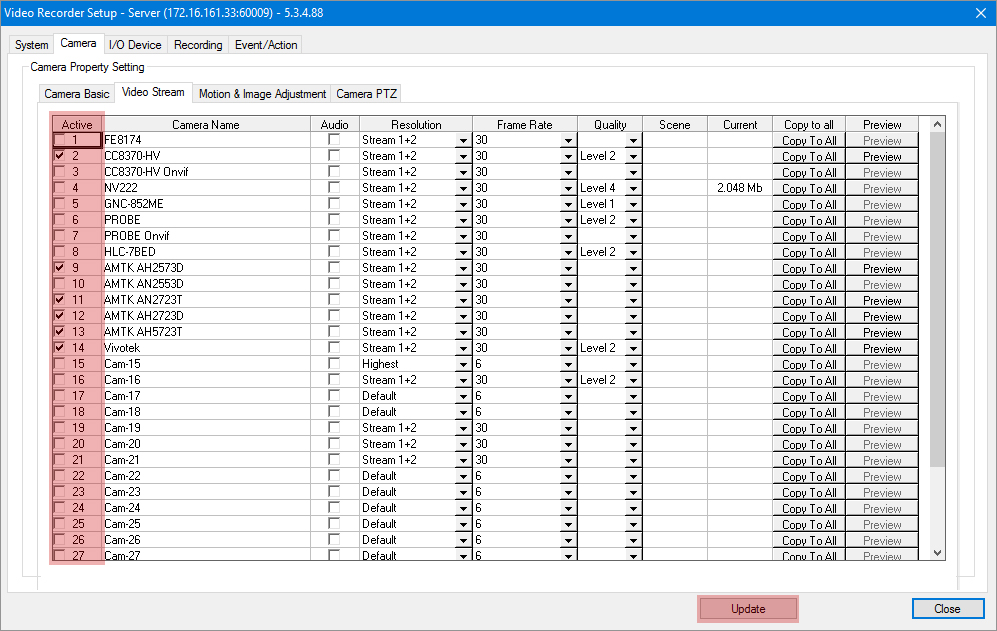
- Now click on the Video Stream tab;
- Click the Active check box, followed by clicking on the Update button.